Paper Wedding Crafts: DIY Topiary


Beginner
|
2 hours

Taught by Lia Griffith
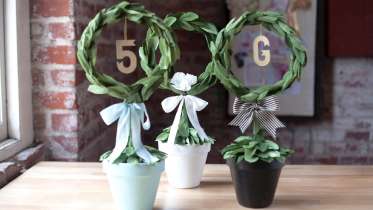
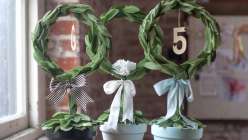
In Part 3, Lia puts a modern spin on classic topiaries by making them out of paper. To make this timeless wedding staple, you'll begin by painting a terra cotta pot and filling it with copper tubing and foam to create the topiary shape. After that, you'll cover the form with hand-cut crepe paper leaves to give it a lush, organic look. Lia shares ideas for embellishing the topiaries, and also shows you how to add decorative table seating numbers for an overall look that is earthy, handsome and classic.
Learn how to:
- Paint terra cotta
- Make topiary shape out of foam and copper tubing
- Cut out leaves
- Attach leaves to topiary and embellish
Chapters
|
01:06
|
|
13:08
|
Materials
Here’s what you’ll need:
- Crepe paper in several shades of green (Lia uses floral crepe)
- 6”-wide terra cotta pot
- 5” foam ball
- Hot glue gun and glue sticks
- Paint
- Paintbrush
- Wire cutting pliers
- Scissors
- 45” of ¼”-wide soft copper coil
- Ribbons or paper flowers (optional)


Member Gallery
Browse members' projects from this class, add them to your Favorites, and share your own work!
Load More
Discussion
Notes
Your timecode tags and notes for this section
Transcript
Paper Wedding Crafts

Part 1:
Paper Wedding Crafts: Create a Floral Head Wreath
In Part 1, Lia shares a classic wedding project—a floral head wreath perfect for a flower girl, bridesmaid, or even a bride. Lia will walk you through each step of the wreath-making process, from making the paper flowers and buds, to attaching them to the floral wire and finishing the ends with a pretty ribbon. Since the wreath is made from paper flowers, it will look great all day long and will last forever as a keepsake.
Part 2:
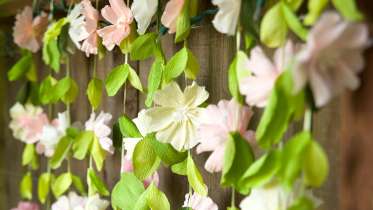
Paper Wedding Crafts: Make a Flower Garland Backdrop
In Part 2, learn how to make this stunning floral backdrop for your big day. Bedecked with gorgeous paper blooms and leaves, this backdrop would work perfectly behind an altar or even as a festive photobooth. Lia shares clear step-by-step instruction for cutting out the paper petals and leaves, making the blooms, and creating the garlands. The ribbon garlands are tied on to a branch at the end, making it easy to customize the size of your backdrop to suit your space. This is an ideal project to make with friends—throw a craft party and you'll have a gorgeous hanging backdrop whipped up in no time!
Now Playing
Part 3:
Paper Wedding Crafts: DIY Topiary
In Part 3, Lia puts a modern spin on classic topiaries by making them out of paper. To make this timeless wedding staple, you'll begin by painting a terra cotta pot and filling it with copper tubing and foam to create the topiary shape. After that, you'll cover the form with hand-cut crepe paper leaves to give it a lush, organic look. Lia shares ideas for embellishing the topiaries, and also shows you how to add decorative table seating numbers for an overall look that is earthy, handsome and classic.

Part 4:
Paper Wedding Crafts: Make 3-D Monogram Letters
For Part 4, Lia presents a fabulous way to celebrate the happy couple on a large scale—with glamorous, monogram letters. These oversized 3-D letters are constructed with chipboard and paper tape, and the templates provided can be adjusted to make letters in any size you please. Once you've created the base, Lia shows you how to give the letter a luxe finish with gold leaf. She also shows how versatile this project can be by offering other ideas for decorating the letters with hand-cut paper leaves and silk flowers to create a completely different style.
Who's Recently Taken This Class
Meet other crafters who have recently taken this class.
Lila and Molly
Carol Adams-Connor
Pollyanna Depper

Paula Mariani
Rania O.D.
Erica Espinal
Maribel Taxiarhopoulos
Crystal Nascimento
Gillmore Gillmore
chong fei
Salpie Bazerkanian
Oana Manolea
Katie Ottenheimer

julie kwon

Cristina Quezada

Sowjanya Gajula

Elena Cristea
Sabrina De La Cruz
Karen Brown
Related Classes